Sunday, October 16, 2011

Lettuce Seed Saving


Last Thursday's class, we learned about the process seed saving by collecting seeds from our own lettuce plants. Lettuce was a good plant to start with, in part because we had so much of it, but also because lettuce seeds are self-pollenated, so they are unlikely to cross-pollenate with other seeds. As you can see, lettuce seeds are extremely small, but what they lose in size they make up for in abundance; each flower contains at least a dozen seeds. Here are a few tips about saving lettuce seed:


1) Even if you only need a few seeds, choose and mark more than one plant to collect seeds from. This encourages biodiversity, since different plants may have slightly different seeds; one may be more pest resistant, for example, and another may be better able to tolerate more water. Make sure you mark the plants you will take seed from. This can be done with something as simple as a tag or a label stuck into the soil next to the plant.
2) The seeds of lettuce plants are contained in small flowers that form late in the plant's life, when it is "bolting," or going to seed. These are the stages of a bolting lettuce plant:
a) A stalk will emerge from the top of the plant.
b) This stalk will grow and flower.
c) The flower will self-pollenate and turn into a small puff, not unlike a smaller version of a dandelion.
Many gardeners regard bolting lettuce as a problem, but it is merely a stage in the lettuce's life cycle. As long as you harvest the leaves before the lettuce starts to bolt, those little flowers will actually be to your benefit, as they produce the seeds that you can use to have lettuce forever.
3) Once the seed heads have dried a bit, trim and collect the stalks and harvest the seeds. With lettuce, the easiest method is to just shake them free into a sheet or basket and then collect them into a seed packet. If you'd like to be more thorough, another method is to pull the flowers out of each seed with your fingertips.
4) Next, dry your newly harvested seed for a day or two. There are two possible ways of doing this. If it is sunny, you can just leave the seeds out to sun dry for a day or two, covering them over at night. If the weather is more dark and damp, a good strategy is to hang your stalks in a paper bag inside a warm, dry cupboard.
5) Label your seeds! Although a seemingly obvious step, labeling is extremely important. Write the date, name of variety and germination rate (see below). It's a good idea to do a germination test here, to see how viable your seeds are.

GERMINATION TEST
For this simple test, you will need paper towels, sealable plastic bags, a marker, and a notebook.

1) Moisten a paper towel, so that it is damp but not soggy. A misting spray bottle is a good tool to use.
2) Choose at least ten seeds that you think represent your seed population. For example, we had black, white and gold seeds, so we made sure to include all three in our test. The more seeds you use, the more statistically accurate your results will be.
3) Place your selected seeds on one half of the damp paper towel, and fold it in two over the seeds.
4) Place the towel with the seeds into a partially closed plastic bag. Label the bag. Write the variety of seed, date, and number of seeds on the bag and in your notebook.
5) Keep the bag in a warm, dark place such as a kitchen cupboard. Check the seeds on a daily basis. Note seed progress in your notebook. Make sure to keep the paper towel evenly moist.
6) After several days (the exact time depends on the variety), your seeds should begin to germinate. If a seed looks moldy or rotten, make a note and discard it. If a seed begins to grow, make a note and discard it. Keep notes on how many good and bad seeds you have discarded.
7) After around two weeks, or when all of the seeds have been discarded, tally up what percentage of your seeds were good and bad. If you have a germination rate 50% or higher (meaning that at least 50% of the seeds were good), then go ahead and plant them. Keep in mind that you will only get as many seeds as the germination rate dictates; for example, if you have a 70% germination rate and you plant ten seeds, you will probably only get seven plants. If your germination rate is less than 50%, it's best to buy fresh seed.

Tuesday, October 11, 2011

Menu and Recipes from our Mexican Feast


Menu:
Handmade Corn Tortillas
Salsa Verde
Pico De Gallo
Vegetable Fajitas
Gallo Pinto

Recipes and Ingredients:

Corn Tortillas:

INGREDIENTS
Masa Harina and Water
2 cups of Masa Harina to 1-1/4 (yield: 12-15 6” tortillas)

About Masa Harina: To make masa harina, field corn (or maize) is dried and then treated in a solution of lime and water, also called slaked lime. This loosens the hulls from the kernels and softens the corn. In addition, the lime reacts with the corn so that the nutrient niacin can be assimilated by the digestive tract. The soaked maize is then washed, and the wet corn is ground into a dough, called masa. It is this fresh masa, when dried and powdered that becomes masa harina.


DIRECTIONS
Mix the Masa Harina and the water; knead to form your masa (dough)
Pinch off a golf-ball sized piece of masa and roll it into a ball
Set the masa on a piece of plastic in the tortilla press; cover with another piece of plastic
Press the masa
Transfer the tortilla to a hot, dry skillet
Cook for about 30 seconds on one side; gently turn
Cook for about 60 seconds (it should puff slightly); turn back to the first side
Cook for another 30 seconds on the first side
Remove and keep the tortilla warm

Salsa Verde

INGREDIENTS (Yields 2 cups)
2 large fresh Anaheim chilies
1/2 pound tomatillos, husked, rinsed, diced
2 large green onions, chopped
1 large serrano chili, stemmed, seeded
2 large garlic cloves
1/4 cup (firmly packed) fresh cilantro leaves
1 tablespoon fresh lime juice (optional)


DIRECTIONS
Remove papery husks from tomatillos and rinse well.
Cut Anaheim chilies and tomatillos in half and place cut side down on a foil-lined baking sheet with whole garlic cloves. Place under a broiler for about 5-7 minutes to lightly blacken the skin- make sure not to char garlic as it will turn bitter.
Place tomatillos, lime juice, onions, cilantro, chili peppers, in a food processor (or blender) and pulse until all ingredients are finely chopped and mixed. Season to taste with salt. (Can be made 1 day ahead. Transfer to small bowl; cover and chill. Rewarm before serving.)


Gallo Pinto (Costa Rican Rice and Beans)

INGREDIENTS (serves 6)
2 tablespoons canola oil
1 medium onion, finely chopped
2 garlic cloves, minced
3 cups cooked white or brown rice
2 cups cooked black beans, drained and rinsed
1 teaspoon ground cumin
1 teaspoon ground coriander
1/2 teaspoon ground ginger
2 -3 tablespoons Worcestershire sauce        
Salt & freshly ground black pepper, to taste
Fresh cilantro         (optional)
Sliced green onion         (optional)

DIRECTIONS
Heat oil in a large skillet over medium heat.
Add onion and sauté until it just begins to soften and turns color.
Add garlic and sauté for about 5 minutes, or until onion is golden.
Add spices and Worcestershire, and stir into onion and garlic.
Next, add the beans and then the rice.
Combine the rice and beans evenly and cook until mixture is heated through.
Add salt and pepper to taste and serve hot.
Garnish with some chopped cilantro or green onions if you prefer.

Pico De Gallo

INGREDIENTS (yields 3 cups)
3 ripe plum tomatoes, seeded, pulp removed, finely chopped
1 medium white onion, finely chopped
2 large cloves garlic, minced
2/3 cup cucumber, peeled, seeded, finely diced
2 tablespoons minced cilantro leaves
3 or 4 fresh Jalapenos, seeded, very finely chopped
1 tablespoon white wine vinegar
1 tablespoon fresh lime juice
Salt to taste

DIRECTIONS
Mix tomatoes, onion, garlic, cucumber, radishes, cilantro, chilies and vinegar. Sprinkle lime juice over all. Add salt to taste.

Best if refrigerated, covered, for at least 1 hour, and served the same day made.

Veggie Fajitas:
INGREDIENTS (serves 4)
2 teaspoons olive oil
2 cloves garlic, minced
2 green bell peppers, sliced
2 yellow bell peppers, sliced
1/2 onion, sliced
1-cup mushrooms, sliced
3 green onions, chopped
Lemon to taste

DIRECTIONS
In a large frying pan over a medium heat, sauté olive oil and garlic. Let the garlic saute for 2 minutes, stir in the green and yellow bell peppers. Let the peppers sauté for 2 minutes, stir in the onions. After two minutes add the mushrooms and green onions to the frying pan. Season the vegetables with lemon pepper to taste and stir well. Cover the frying pan and cook until all of the vegetables are tender.

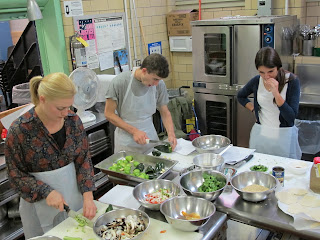
A Historic First- Cooking in BHSEC's Cafeteria Kitchen


Many, many thanks to our spectacular school cook Evelyn for helping out and teaching us a few new tricks!

mexican feast!!

Gardening is one thing. Cooking is another. In this class, I am definitely the least experienced chef (my expertise is putting a pinch of cinnamon in a pan before adding sourdough bread with sharp cheddar cheese. It's a really good grilled cheese!). Even so, and with the combined efforts of the amazing chefs in the class and Evelyn, our awesome school chef, on Thursday we cooked Mexican food with fresh ingredients.
Handmade corn Tortillas. Vegetable Fajitas. Pico de Gallo. Salsa Verde. Gallo Pinto. SO GOOD. I won't write anymore about the food; no point in describing it, it'll only make people upset they don't have any. Like Miles Davis said, "Writing about music is like dancing to architecture." Here, food is music.
BUT, I will say that cooking has a chemistry behind it, that, although boring to many, is the reason our food becomes tastier and chewier after we cook it. As long as you focus on what the chemistry does to the food, the science behind cooking can be nice to know.

Seed Saving//GMO's

Last tuesday we discussed the importance of seed saving, especially with the recent proliferation of genetically modified organisms [GMO's] in the marketplace and farms. Historically, agriculture progressed through the selection of preferred traits in fruits and vegetables. Hunters and gatherers - when they weren't hunting and finally settled down- and farmers both selected for 'mutant' traits, finding, for example, big berries in a dominantly small-berry bush. After finding a plant with desired traits, farmers would gather and save its seeds. A farmer now had a seed library from which he could take a seed he selected for, plant it, then begin the process of selection again. This agricultural selection took time, and quite a bit of it. I believe this time allowed farmers to appreciate and respect their crops as living beings beyond only food. It also allowed for much tastier food for people! Enter science.
With genetically modified organisms, traits are selected for, but not in the historical sense. They're selected from a menu of desired features. "Oh, well, hmm...these red beets could be a bit more...golden! and uh... plump! and could I add some more sugar?" I imagine this is what industrial farmers say. Of course, the Green Revolution feeds many more people than traditional agriculture can, but at a cost to nature and a long-term risk for people.
GMO's are plants too. And plants reproduce, something they're are quite good at after doing it for millions of years. To survive, they have evolved -through natural selection- neat and sometimes tricky ways of reproducing. So, when GMO's are planted near non-GMO's, there is a high chance of cross pollination. In that case, GMO's contaminate non-GMO's. Natural crops with one set of features are contaminated by GMO crops with a completely different set. The chances increase of a genetic monoculture, whereby GMO's would completely dominate another crop, leaving only themselves. I won't argue about whether GMO's are fundamentally evil, or about Monsanto, or the 1980's legislature declaring life patent-able, but I will say that mono-cultures scare me. If we rely on mono-cultures for our bananas and turnips, not only do we risk those mono-cultures being wiped out by a single disease: our food becomes boring! On an end note, we eat ONE type of banana in the U.S., while Indians have a selection of about 300 different types of bananas.