I love design. Design can be as "simple" as rearranging objects on a shelf to as "complex" as planning high speed rail routes in China. A note on engineering: while engineering is design with constraints; design is essentially art with constraints; art is imagination and creativity manifested in something (forgive the broad, generalizing definitions). You can design tennis balls, art exhibits, experiences of spaces, textiles, methods and experiments, and so on. Anything that has a purpose (and SO MANY THINGS HAVE A PURPOSE!) can be designed. When I walk down city streets and see rain puddles, littered candy wrappers, billboard advertisements; when I hear talking people, running car engine, trees rustling in the wind; and when I think about all these while experiencing them, I think: could all this be designed? I am not speaking about the religious question of "Intelligent Design." I think about my ambulatory experiences as thought experiments: if what I experience is not designed as a whole; if what I experience is the result of natural processes (wind, rain, etc) and of people living their lives (litter, driving cars, etc.), then what is designed about it? I think it is the candy wrappers, the city streets, the billboards and their advertisements, the placement of trees: anything that is created by humans is designed. Not everything we create is well designed, but because anything we create is designed, this gives us a chance to make what we create beautiful from both a formal and functional perspective! We have created our garden, so lets design it and let's design it well. I am excited for this project!
Tuesday, December 13, 2011
Garden Design
A quick summary of last week's proceedings: Brook Klausing is the senior designer for and creative director of Brook Landscape, a Brooklyn-based design, construction, and project management company. For the next few weeks Brook and his company will help us design the garden! Brook guided a discussion about design; this discussion will help us channel our creativity and energy into a focused project. Here's the plan: 1) Observe, sketch, and record the garden. 2) Each class member will create a unique garden design that considers both required and desired garden elements. 3) Discuss, analyze, and critique these preliminary designs 4)Condense, unite, and combine these designs into one coherent final design. 5) Present this final design to Brook Landscape, Principal Lerner and other members of BHSEC's adminstration, and others whose name I do not know. 6) If the designed is approved, work with Brook Landscape to build the garden! If it is rejected: frown, scowl, cry, and then redesign.

Monday, December 5, 2011
Putting the Garden Away for the Winter
This Thursday, we finished fully winterizing the garden. This meant tearing out all of the plants that were or would soon be dying because of the frost, like the lettuce, deadheading perennials like our marigolds, replacing old mulch, and generally cleaning away debris that could rot or get filled with pest eggs or disease spores. It was a bit like spring cleaning, only in November. We collected the debris to compost later.
We also planted a variety of daffodil bulbs, since bulbs can grow under the soil during winter and won't perish. In order to keep pests and rodents from digging up the bulbs and eating them, as they are wont to do, we used rat poison. Just kidding! We did not use rat poison! Instead, we used cayenne pepper, which is a deterrent to pests, and is not harmful to people, unless it gets into their eyes (the latter possibility did become something of a problem.)
Here's a passage on what's going on in your garden during the winter, taken from our handout on winterization.
While it appears as if all activity in the garden has stopped, there's a lot going on under the soil until it freezes. Newly transplanted trees and shrubs, divisions of perennials, and hardy bulbs are all growing roots, drawing on soil nutrients and moisture around them. earthworms and various microbes in the soil are still processing the organic material they're finding. Most likely, the organic mulch you spread to protect the soil has substantially decomposed. It's important to spread new mulch now--a thicker winter layer--to protect plants and soil over the winter months. The idea is not to much to keep the soil warm as it is to keep the temperature even. Once the soil is frozen, mulch keeps it frozen. Snow both protects and endangers plants.
Hopefully we'll get some pictures of our winterization up soon!
We also planted a variety of daffodil bulbs, since bulbs can grow under the soil during winter and won't perish. In order to keep pests and rodents from digging up the bulbs and eating them, as they are wont to do, we used rat poison. Just kidding! We did not use rat poison! Instead, we used cayenne pepper, which is a deterrent to pests, and is not harmful to people, unless it gets into their eyes (the latter possibility did become something of a problem.)
Here's a passage on what's going on in your garden during the winter, taken from our handout on winterization.
While it appears as if all activity in the garden has stopped, there's a lot going on under the soil until it freezes. Newly transplanted trees and shrubs, divisions of perennials, and hardy bulbs are all growing roots, drawing on soil nutrients and moisture around them. earthworms and various microbes in the soil are still processing the organic material they're finding. Most likely, the organic mulch you spread to protect the soil has substantially decomposed. It's important to spread new mulch now--a thicker winter layer--to protect plants and soil over the winter months. The idea is not to much to keep the soil warm as it is to keep the temperature even. Once the soil is frozen, mulch keeps it frozen. Snow both protects and endangers plants.
Hopefully we'll get some pictures of our winterization up soon!
Wednesday, November 30, 2011
Cooking Class # 2 :D
On Tuesday Novemeber 22, our class was paid another visit by Isa to help with our cooking. We used raw kale for our Quionoa salad. And also had a delicious broth that Isa brought in. In this class we learned many methods in making sure that we are getting the most nutrients out of the food we eat. For example, instead of including all the kale into our salad, we made sure to get rid of the stems in order to break down the kale. We also learned that its better to soak grains because it makes the nutrients more digestible.
These are the things we included in our salad:
Large bunch of kale
2 red peppers
2 cucumbers
3 carrots
handful of raw sunflower seed
handful of raw walnut
1 or 2 lemons
olive oil
balsamic vinegar
salt
2 cups of cooked quinoa (cooked in water)
handful of raisins

(Our salad in the process of making)
We cut the vegetables and walnuts to make them more proportional to each other.
Before mixing all this together, we made sure to massage the kale for a good 10-15 minutes, which helps break down the kale (we noticed that the color changed a bit after we were done massaging and the smell became much stronger)

Isa brought in a bone broth which helps support the immune system and our bones/joints. When the cap was taken of the broth a thin layer of fat was resting on top. It is recommended to leave this fat there because it helps preserve the broth.We heated the broth and those who wanted had the choice to add mushroom, chives and tofu.

It was a very healthy meal and was prepared quite quickly with the great cooperation of our class. It inspired me to be more creative with my own salads.

Thursday, November 24, 2011
Herbs with Isa
On Thursday, November 17th, the Food Politics clan was paid a visit by a very kind herbalist under the name of Isa Brito. She is the mother of a student here at BHSEC, and so she came prepared with plenty of natural stress-relievers, all of which I will address in just a minute.


As a prelude to our evening of witchcraft and wizardry, Isa first explained to the class that many people neglect their local and natural medicinal resources for big-brand products like Tylenol and Advil for the simple reason that we don't know such resources exist. It is also a common misunderstanding that GOOD herbal medicine is expensive and must be imported from other countries (Australia for tea tree oil, or Hawaii for Kava Kava), when in fact, they are right under our feet. I have provided summaries of our experiences with two of the herbs me had the privilege of learning about during Isa's visit.


OAT STRAW: The first of the herbs examined and tested, Oat Straw is a leafy stalk that can be consumed at any time of the day, regardless of your emotional whereabouts, and can easily substitute water when mixed properly and proportionally. Oat straw is good for just about everything; from skeleton to muscle, Oat Straw helps to build up the Nervous system against stress (grrr...), keeping us strong, healthy and happy. To create a magical Oat Straw remedy, you need one other ingredient, aside from the herb itself: water. First you might need to take a trip to the local hardware store to pick up the quart size glass jar that is crucial to the making of this tasty and nutritious drink. After that, add approximately 10g of Oat Straw to the jar, and fill it with water (I've included a list of resources that Isa recommended as a means of purchasing a personal supply of Oat Straw). Lastly, the straw must be left to soak for at least four hours so that the nutrients (calcium, phosphorus, potassium, B complex, Vitamin A and Vitamin C) can leave the plant. After the Hay Straw has soaked, filter the mixture of its chunky bits and it's ready to go.
KAVA-KAVA: Kava Kava is a muscle relaxer. It is good to drink as a tea, in smaller quantities rather than larger, for the reason that "It will make you feel like Jell-O", as Isa so accurately stated. Last Friday when I was young and stupid, I took it upon myself to test this theory, and consumed three cups of Kava tea, underestimating the suggestion that one is enough. At one point i found it impossibly difficult to form words, however the satisfying taste coaxed me further into my herbal adventure. Kava Kava tea can be made by filling a DIY tea bag with around 1.5 teaspoons of the herb in a cup of hot water. Might I add that the tea is especially scrumptious with a spoonful of Blue Agave Nectar, which adds a heavenly sweetness to the concoction.


After learning about the herbs above, as well as Lemon Balm, Chamomile, Rosemary, and many others, Isa concluded the evening with the distribution of goody bags (herb samples) to all contenders.
Lastly, here are two websites Isa provided if anyone needs a place to purchase their herbs.
www.mountainroseherbs.com
www.jeansgreens.com
Some shops Isa thought you might like to visit are...
Flower Power-- East 9th street off 1st avenue
Herb Shoppe--Atlantic Avenue, Brooklyn
-Francesca Craft
Wednesday, November 16, 2011

Community Gardens
Last Thursday BHSEC’s food politics took a field trip. Over the last few weeks our class has been discussing community gardens, and the abundance of these gardens on the lower east side in particular. Community gardens are hard to define, they fall into the cracks of law between public parks and private space. Though some do visit the gardens (as we did) they are mostly enjoyed by members of the surrounding neighborhoods.

In the East Village alone there are 39 gardens -- and that’s only the East Village, there are countless more that span the area of the rest of the five boroughs. In the 1970’s there was a major surge for a gardening movement when financially decrepit neighborhoods became more prone to crime and drugs. During this time in New York City history many landlords abandoned buildings, and these buildings ended up crumbling and empty. The city was losing money fast, and couldn’t afford the upkeep of the abandoned lots, and the number of squatters multiplied. Eventually, these buildings were torn down and the lots after a lot of TLC, became community gardens.
We only got to visit a couple community gardens in the short time our class spanned, but I can honestly say that the ones we did get to see were amazing, and very inspiring. Most gardens are closed at this time in the year, so we only got to go inside two of the gardens, but even just looking through the gates of these gardens, you can tell, a lot of heart and soul has gone into making these gardens what they are. The first one we saw, “Le Petit Versailles” or The Small Versailles, was the smallest garden we saw, but what it lacked in size, it made up in beauty.
These “Cat Eyes,” caught my eye at once, all along the West wall of the garden they stared out from behind vines that climbed up the neighboring building’s wall; it was almost haunting. The garden however, was altogether very sweet, and cozy. It was a small pocket of greenery in an urban metropolis. There were two gardeners who showed us around the garden, and as Tess asked when they would be closing for the winter they excitedly launched into a conversation on their plans to construct a winter igloo so that the weekly poetry readings could continue uninterrupted. Lastly, Tess showed us to a large compost bin, much larger then our own in the BHSEC yard, and explained how the compost was maintained by the state to help encourage reusable resources.
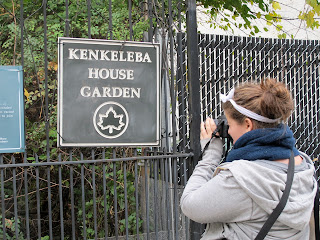

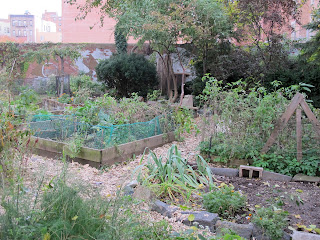
Another Garden we went to was “Kenkeleba Garden,” a very different sort of garden. When first came to the garden it appeared to be locked, but after a few minutes a lovely women informed us that the garden was in fact, not closed at all, and that ‘we should just be careful of rocks on the path.’ This garden was beautiful in an entirely different way from “Le Petit Versailles,” this garden was less of a traditional garden -- rather it was a sculpture garden. Kenkeleba Garden is mostly a sculpture garden, and exhibition space that displays minority artists from a wide variety of backgrounds. We saw many interesting pieces:
The last garden we saw that day was called “El Jardin Del Paraiso” and even though we didn’t get to go in it was clear to once that this Garden was the biggest. The Garden spanned the entire width of block it was on, and easily took the space of two standard tenement houses. All that being said it was lovely. The Garden itself was comprised mostly of grassy lawns. One of the defining fetures of the land was the giant weeping willow tree that had spurn up on the south east corner of the garden. Tess told us that it had to be hundreds of years old, as it was huge. It was amazing. At the base of the wide trunk there was also a tree house. I was particularly amused by this tree house, and wished we could go inside the garden.


Overall the field trip was Amazing and I learned so much about the culture of the lower east side. The Gardens themselves were beautiful and I thought that more then anything I am excited for spring when I can go visit again. I would encourage anyone curious to check them out! Below are some helpful resources to get you started.




Resources:
History of Community Gardens:
List of Gardens:
As a resource for this post I was able to borrow Tess’s copy of “Community Gardens of the Lower East Side,” it was a wonderful read. It supplies a comprehensive history of every garden on the lower East Side, as well as a detailed map. You can pick up a copy at The Saint Marks Bookstore on Saint Marks Place in Manhattan.
Sunday, October 16, 2011
Lettuce Seed Saving


Last Thursday's class, we learned about the process seed saving by collecting seeds from our own lettuce plants. Lettuce was a good plant to start with, in part because we had so much of it, but also because lettuce seeds are self-pollenated, so they are unlikely to cross-pollenate with other seeds. As you can see, lettuce seeds are extremely small, but what they lose in size they make up for in abundance; each flower contains at least a dozen seeds. Here are a few tips about saving lettuce seed:
1) Even if you only need a few seeds, choose and mark more than one plant to collect seeds from. This encourages biodiversity, since different plants may have slightly different seeds; one may be more pest resistant, for example, and another may be better able to tolerate more water. Make sure you mark the plants you will take seed from. This can be done with something as simple as a tag or a label stuck into the soil next to the plant.
2) The seeds of lettuce plants are contained in small flowers that form late in the plant's life, when it is "bolting," or going to seed. These are the stages of a bolting lettuce plant:
a) A stalk will emerge from the top of the plant.
b) This stalk will grow and flower.
c) The flower will self-pollenate and turn into a small puff, not unlike a smaller version of a dandelion.
Many gardeners regard bolting lettuce as a problem, but it is merely a stage in the lettuce's life cycle. As long as you harvest the leaves before the lettuce starts to bolt, those little flowers will actually be to your benefit, as they produce the seeds that you can use to have lettuce forever.
3) Once the seed heads have dried a bit, trim and collect the stalks and harvest the seeds. With lettuce, the easiest method is to just shake them free into a sheet or basket and then collect them into a seed packet. If you'd like to be more thorough, another method is to pull the flowers out of each seed with your fingertips.
4) Next, dry your newly harvested seed for a day or two. There are two possible ways of doing this. If it is sunny, you can just leave the seeds out to sun dry for a day or two, covering them over at night. If the weather is more dark and damp, a good strategy is to hang your stalks in a paper bag inside a warm, dry cupboard.
5) Label your seeds! Although a seemingly obvious step, labeling is extremely important. Write the date, name of variety and germination rate (see below). It's a good idea to do a germination test here, to see how viable your seeds are.
GERMINATION TEST
For this simple test, you will need paper towels, sealable plastic bags, a marker, and a notebook.
1) Moisten a paper towel, so that it is damp but not soggy. A misting spray bottle is a good tool to use.
2) Choose at least ten seeds that you think represent your seed population. For example, we had black, white and gold seeds, so we made sure to include all three in our test. The more seeds you use, the more statistically accurate your results will be.
3) Place your selected seeds on one half of the damp paper towel, and fold it in two over the seeds.
4) Place the towel with the seeds into a partially closed plastic bag. Label the bag. Write the variety of seed, date, and number of seeds on the bag and in your notebook.
5) Keep the bag in a warm, dark place such as a kitchen cupboard. Check the seeds on a daily basis. Note seed progress in your notebook. Make sure to keep the paper towel evenly moist.
6) After several days (the exact time depends on the variety), your seeds should begin to germinate. If a seed looks moldy or rotten, make a note and discard it. If a seed begins to grow, make a note and discard it. Keep notes on how many good and bad seeds you have discarded.
7) After around two weeks, or when all of the seeds have been discarded, tally up what percentage of your seeds were good and bad. If you have a germination rate 50% or higher (meaning that at least 50% of the seeds were good), then go ahead and plant them. Keep in mind that you will only get as many seeds as the germination rate dictates; for example, if you have a 70% germination rate and you plant ten seeds, you will probably only get seven plants. If your germination rate is less than 50%, it's best to buy fresh seed.
Subscribe to:
Posts (Atom)